Easy Kitchen Update on a Budget
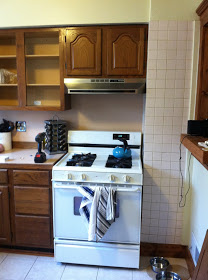
Although we have a few projects in the cue right now, we don’t have any current before or afters to show. I thought we would do a throwback to our Ferndale kitchen, where we updated the space on a budget. We were not as ambitious as we were in our current house; we wanted to keep the footprint of the kitchen, and the cabinets were still in good shape. Caution: these photos were not taken on a fancy camera, so they are quite blurry.

Painting Kitchen Cabinets
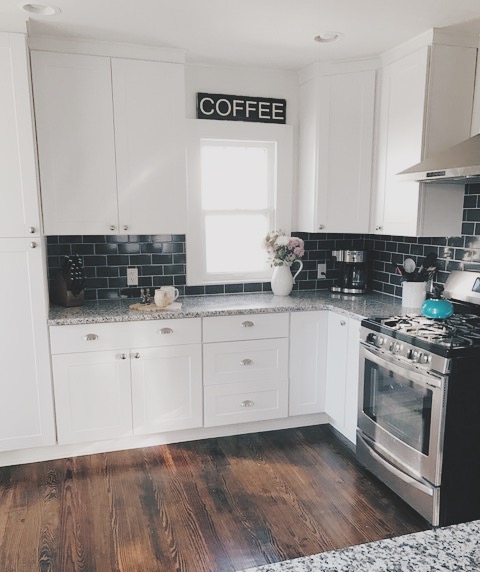
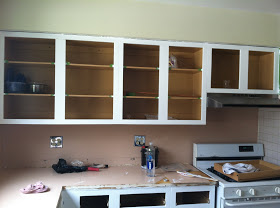
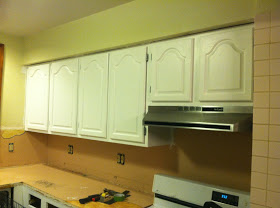
The first thing we did was take off all of the doors and drawers and sand them. I do not have pictures of the process, but just imagine a lot of dust and sweat. We then painted each door, drawer, and the cabinet boxes a bright white. We made sure to use a good quality paint that would stand up to the wear and tear of a kitchen.
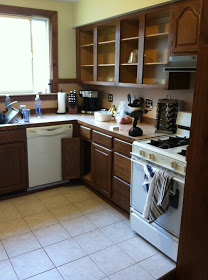
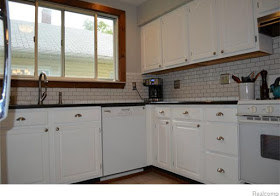
The counters were a pale pink color- it looked like a ice cream shoppe. A black counter top seemed to be the way to go. A local granite guy that gave us a pretty good deal, all we had to do was demo the counter top ourselves!
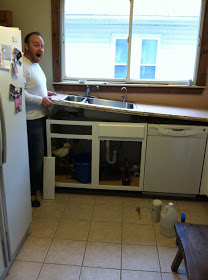
We ordered an undermount sink from the granite guy, so they installed the sink for us when they installed the counter tops.
Updating the Back Splash
I had never installed a back splash before, but I was pretty sure that between Jeff, myself, YouTube, and our incessant watching of HGTV, we could figure it out. We went with a simple subway tile that came on a sheet. This made it so much easier to install! We were a little burned out on projects at this time, so we made a pact. Every night we would work on the back splash after dinner until 9 o’clock. This way we could break up the project into smaller chunks, but we could still relax in the evening. It took a little longer than installing tile should have, but it saved our sanity.

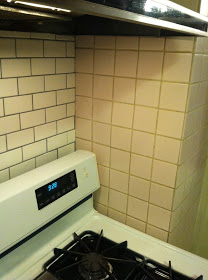
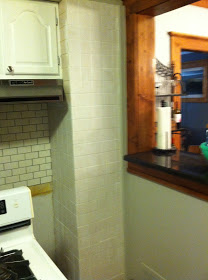
You may be looking at that tile on the right and think, “Hey, that tile looks pink.” Well, it was. Next to our stove was the chimney, which was covered with a light pink tile. I seriously wanted ice cream every time I waked into that kitchen! Jeff was able to look at the brick from the other side of the chimney, and it was not cute. Where cute, rustic 1920s brick should be, was ugly, gray cinder block. Wah, wah….
We ultimately decided to paint over the tile. Technically, you can’t paint over tile, because it will just scratch off or rub off when you try to clean it. We found this cool product by Rust-oleum that allows for latex paint to adhere to tile. Now, all the tile color matches!
The last thing to change was the mint green paint. After a few coats of gray paint, our kitchen renovation was complete! What do you think?
Before:
After: